Posted in Couture Sewing, Little Black (French) Jacket

LBJ*: My Jacket Now has Sleeves

[*Little Black Jacket sometimes referred to as the LFJ or Little French Jacket]

sleeve pattern
A vintage pattern for nothing but sleeves!

There is nothing quite like setting in the sleeves to make a jacket look like – well, a jacket! Sleeves are interesting, aren’t they? I was browsing some vintage patterns online the other day (like you do), and stumbled upon a pattern from the 1930’s that was nothing but sleeves. I thought, what a great idea! Well, it’s part of a great idea. You have to have a garment body that suits them!There is little doubt that the same body with different sleeves can look vastly different. Even the pattern I’m using for my homage to Chanel’s Little Black (French) Jacket has two sleeve variations.


I’ve chosen to make it with the two-piece, bracelet-length sleeves for this time around (I’m already considering the next one!).

Even Chanel herself gave a lot of thought to her sleeves. In the past when I’ve put sleeves in jacket-like garments, they have always tended to be a single pattern piece. If you think about it, this kind of construction doesn’t give much leeway for what our arms are really like – that is, they bend. A real Chanel jacket always has at least a two-piece sleeve and usually a three- piece one which allows for having some ease in one of the seams at the precise place where our elbows bend. In addition, the multi-piece sleeve permits the sleeve to be narrower which gives it a more polished, well-fitting, custom look.

Another of Chanel’s concerns about sleeves was that they have a relatively high armhole. This vintage photo of Chanel herself shows her holding up her arm to demonstrate that a higher armhole allows the jacket to remain in place when the wearer raises her arms. What a great idea.

coco-chanel_sleeve
Coco Chanel demonstrating the advantages of the high armhole (Smithsonian)


Anyway, all of this research leads me back to the challenge of the day: preparing and setting in the sleeves on my own jacket.

I have already joined each sleeve’s two pieces ensuring that the requisite ease has been included. I have also machine-quilted the lining to each of the pieces. Now I am ready to construct them.

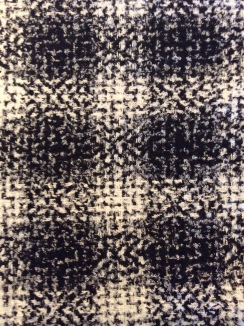
I pin back the lining along the seam just as I did when constructing the jacket body so that it doesn’t get caught up. Then, using a 3.0 mm stitch length and my trusty walking foot (could not live without it) as always with this bouclé, and remembering that I’m using a 1-inch seam allowance, I sew the seam. Then I add the two rows of ease stitching (5.0 mm stitches) over the top of the sleeve head.

IMG_1078
Seams are now sewn and the lining needs to be finished.


I begin pressing the seam by pressing it flat first, then using a seam roll (or in my case a rolled up towel since I’ve been too cheap to buy an actual seam roll), I steam the seam allowances open with the tip of my iron. Then I steam it lightly from the right side to finish the pressing. I trim the seam allowances then it’s time to deal with the lining.

Using the same technique I used with the body of the jacket, I first secure the one-and-a-half-inch hem with a catch stitch, then use a lapped seam for the lining along the seam and fold under a half-inch above the hem. Then I use that ladder stitch to hand sew the lining in place. Now I’m ready to shape the shoulder.

IMG_1083
Using my tailor’s ham

I use my tailor’s ham (fortunately I wasn’t too cheap to buy a real tailor’s ham which in my opinion is an essential sewing item) as a stand-in for a shoulder, I ease in the shoulder shape. It’s now ready to be set in. I am sewing the fabric (without the lining) of the sleeves to the fabric AND the lining of the body (I basted the lining to the jacket body fabric at the armholes ages ago in the process). Many people simply pin-baste the sleeves. I am going to do what I always do with set-in sleeves – I thread baste it in. This is a challenging situation since there is so much fraying fabric and open lining pieces that will eventually have to be hand-stitched into place, not to mention a plaid that has to be matched that I do not want to take a chance on losing pins or having the sleeve shift while I’m sewing. So, working inside what is akin to a paper bag, I slowly sew the armhole seam. When I finish, I hold my breath for a moment as I turn it right-side out. The sleeve is beautiful without a pucker in sight and even more fantastic is that the plaid is perfectly matched. The I have to do it all again on the other side!


Finally, they are in and my jacket looks like it is a real jacket. I just have to trim the seams and then hand sew the sleeve lining to the body lining. They are finished and I am delighted.

I try it on with a bit of trepidation. I altered the shoulder length a bit at the muslin stage and now this is the moment of truth as regards the shoulder fit. There is nothing worse than a jacket that droops over the shoulders when it is designed to be perfectly set at the shoulder line. I adjust things and look in the mirror. Perfect. Well, perfect enough.

I’m getting close to the end of the project although there are still many hours of hand sewing ahead. I first have to consider pockets and trim, but that’s the next step.

Posted in Couture Sewing, Little Black (French) Jacket

LBJ*: Constructing the Jacket Body

IMG_1040
It is high time that this pile of lined fabric pieces began to resemble a jacket!

It’s been quite a process, this project of paying homage to a Chanel icon by constructing a *Little Black (French) Jacket for myself. Many have gone before me – I was happy to use their experience as guidance when I was seeking my mentors to help along the way. Sometimes when I’m sitting at my counter sewing hundreds of tiny little stitches to connect pieces of the silk charmeuse lining together inside my jacket I consider what it must have been like for the seamstresses in the Chanel atelier in 1954 when they were working on the original jackets. Indeed, I wonder what it must be like today for seamstresses in the fashion houses who work on the haute couture garments – there is still a lot of hand sewing. But I’m getting ahead of myself. I need to tell you about what I’m doing.

Now that I have all my pieces quilted by machine, it’s time to construct the body of the jacket. My first task is to sew together the shoulder seams (remembering that I’m using a 3.0 mm stitch and a walking foot for all of these seams in the body), carefully matching the seam lines of the princess seams AND the pattern. It’s a bit fraught, but I do it and it’s perfect! Then it’s on to the side seams.

Since I’m feeling a bit nervous about making sure this is perfect, I decide to baste the seam line first. I do this only on one side only to find that it makes no difference: my pin-basted side works just a well. Years ago, I was taught to pin baste perpendicular to the seam so that the sewing machine could saunter over the pins. These days, everyone says do not ever sew over pins – take them out as you go along. In fact, the Craftsy instructor whose course I’m following, puts her pins in along the seam line which make a lot of sense if you really want to look at the right side to see if everything is matched. Of course, she takes out each pin along the way before she gets to it while sewing. I am now doing the same thing. Those perpendicular pins that I sewed over did, indeed, from time to time, get caught directly under the needle causing the pin to bend, often the needle to break, and there is no telling what kind of cumulative damage that had been doing to my old sewing machine! I will never again sew over a pin!

IMG_1063
Carefully trimming the bulk from the seam allowances after pressing them open.


I finish sewing the side seams and the moment of truth is upon me. Are the patterns perfectly matched? Yes! What a relief. Now it’s time to press the seams open – together flat first, then open with the tip of the iron on the wrong side, finally a light press from the right side.

Then the hem has to be stitched so that it doesn’t fall in future. The instructor uses an invisible catch stitch: I choose a small herringbone stitch (which is often also called a catch-stitch) so that the fraying ends are more secure. Then the front and edges have to be pressed in using the edge of the stay tape as a guide. The neck is tricky since it has to be snipped in – the fraying of the fabric can be a bit troublesome!

The lining now has to be joined at the shoulders and side seams by laying the front pieces flat over each seam, trimming the excess lining, then laying the back pieces over, trimming then folding under, pinning along the way. The lining is placed so that there is a small line of the jacket fabric showing on the inside along the front and neck edges, and there is no chance of the lining peeking out to the outside. The hem is similar, but the hem is folded up so that a half an inch of the fabric is showing. Once all that pinning is done, I start sewing. And I sew a lot.

I use silk thread, a very short, fine needle and a slip stitch for the seams. I use a stitch that is new to me for the front, neck and hem edges. It’s a bit like a ladder that when pulled gently actually creates a completely invisible thread line inside the folds adhering the lining to the fabric. It’s beautiful.

So I finally turn the jacket body right side out and put it on Gloria Junior (that’s what I call my mannequin). She’s still armless, but I love her anyway! Sleeves are next up!


A helpful resource:

Here’s a great blog post I found on How to Do the Ladder Stitch: http://www.squishycutedesigns.com/ladder-stitch/

Posted in Little Black (French) Jacket, Style

LBJ*: Sewing Like a Chanel Seamstress**…Quilting the Jacket

[*Little Black Jacket sometimes referred to as the LFJ or Little French Jacket]

In 1954 Coco Chanel made a return to the Paris couturier scene after something of a hiatus during and immediately after the second World War. The House of Chanel had been closed for fifteen years, but now it was time to return. During her absence, Paris style had been dominated by the likes of Christian Dior whose “New Look” had created those hour-glass shapes that constricted women’s shapes nodding more to form than function – no one could truly be comfortable with a corset and bustier! Re-enter Chanel.

new_look_tailleur_bar_vzg_03
Dior’s “New Look” silhouette required lots of undergarments!


Before the war Chanel had already created the first sportswear that women would wear, constructed from knits & jersey’s that had never been used in women’s wear before. Her absence had seen a resurgence of constriction and she was determined to change that. So, that first season saw the birth of what we now know as the quintessential Chanel jacket.

luxury quote coco

What made it different was the construction: it was fashioned from soft bouclé fabrics and lined with silk charmeuse which is truly the most magnificent feeling against your skin. But more important than even the fabrics was the way she designed the construction. Rather than a jacket with interlining and details that made it crisp and stiff, she decided that the lining was to be quilted to the pieces of the jacket and the lining finished by hand. She was striving for luxurious comfort above all, and a jacket that was as beautiful on the inside as the outside. And the construction of the jacket to this day uses this technique. So, if one is going to pay homage to the Chanel jacket, one needs to employ her approach. Dear god…

IMG_1040
My little pile of pieces!

My last report found me finally at a point where the sewing machine would make and appearance. All of the fabric and lining is now cut, marked, the soft tapes to maintain a bit of definition at the front and hemlines has been hand-stitched in place. Now the jacket pieces need to be constructed.


I use a 3.0 mm stitch length as directed by the instructor I’m following and I’m using regular thread (I may regret this) and a walking foot. This is not to be attempted without a walking foot! There are really only a few seams that need to be completed prior to the next big (quilting) step. I am remembering that the seam allowances are a full one inch! Very important to the eventual fit.

I sew the princess seams in the front pieces and the back, and put together the sleeves along the seam, making sure to use ease stitches at the point where the elbow will be. I construct the lining pieces exactly the same way. One of the most important parts of this process, though, is the pressing.

I first press the seams flat, then press them open from the inside using only the point of the iron. Then I turn the piece over and gently press each seam from the outside. The seams took terrific. I don’t trim any seams yet, though. There will be a lot of fraying and I need the depth and stability during the rest of the construction. When I am finished this process I have the following pieces: two front pieces, one back piece and two sleeves – and the same in the lining. They are all in a nice, neat pile. At the end of that lesson the instructor says, “The next step is the quilting. That’s when the fun begins!” And she smiles. Oh. My. Actual. God. The QUILTING!

I cannot remember when I have been as frustrated in a project. The process is thus: With wrong sides together, each piece of lining is machine stitched to its matching jacket piece using a 3.0 mm stitch. Each stitch line is meant to travel down a line of the ‘print’ from about two inches from the top (so that the lining is loose and I will be able to get at the side and shoulder seams in due course. The lines of machine quilting (yes, Chanel jackets are generally machine-quilted) are to be one-and-a-half to two inches apart, all done in the same direction (from the top down) and ending two inches above the hem line. Sounds simple enough. Well…

I make my plan as directed so that I know which lines I’ll follow, pin the seam lines together and use lots of other pins so that the fabrics don’t slide out of place, then begin stitching using that 3.0 mm stitch and silk thread to match the main lines of the jacket pattern – in my case, black. From the right side as directed. Oh my god… the stitches are way more visible on the outside than I want them to be! What to do?

I start unpicking hoping like hell that the stitches don’t make holes in the silk charmeuse. They’re not too bad after I press them out. So I start again. I do another test piece using various threads and stitch lengths. I ask the instructor who agrees that the pattern on the fabric with its white lines crossing black will make it very difficult for this to sink in invisibly. I note that other students are posting with their own similar concerns. No one has a real solution.

IMG_0984
My fabric


lornas fabric
My instructor’s fabric – she has definite black lines to follow!


So, I do it again, using a 4.0 mm stitch and this seems to work better. I only catch the lining up in the stitching twice resulting in having to unpick twice for that reason. I only have one line that seems to have caused a bubble between it and the adjacent one, so only have to unpick for that reason once. I have to do this in several sessions so as not to either tear my hair out or rush through and make a mess.

Finally, it’s done. And it doesn’t look too bad in the end. I have all of the pieces quilted and the next step will be to stitch up the side and shoulder seams and then focus on the lining. That’s for next week! I need a martini now…


[**Please don’t take me to task for using the word ‘seamstress.’ I realize that in some people’s worlds this is a sexist term, but I think someone who sews can call herself (or himself) anything she or he wants: seamstress, sewer, sewist, tailor – you pick one, I’ll pick one today and perhaps another tomorrow. Actually at Chanel they are called ‘mains’ which of course is French for ‘hands’]

Posted in Little Black (French) Jacket

LBJ*: It’s What’s Underneath that Counts (Marking & Stabilizing)

[*Little Black Jacket sometimes referred to as the LFJ or Little French Jacket]

I cannot wait to begin actually constructing my Little Black (French) Jacket that is an homage to Coco herself. But, in spite of all that I’ve accomplished already, and all the time I’ve spent to date, I’m still not there yet. Before I can take the fabric to the machine, I have to prepare it further by marking everything imaginable and stabilizing the edges.

Anyone who teaches sewing online or in the classroom it seems will tell you that one of the keys to a garment that fits and looks professional is ensuring that all relevant pattern markings are transferred somehow to the fashion fabric. In the case of the bouclé and silk charmeuse I’m using for this project I can only use silk thread – both tracing and tailor’s tacks.

I learned to make tailor’s tacks in home economics sewing classes when I was twelve years old. You run a double thread through the pattern and two layers of fabric leaving a tail and a loop. You then cut the loop and carefully peel apart the layers. Then you cut the thread between the layers leaving markings on both layers in exactly the same place.


Unfortunately, with the bouclé, these loops continually slide out leaving me with no markings. So, I’m going to have to use my Craftsy instructor’s technique which involves a single thread through a single layer stabilized with a tiny, tight stitch.

In addition to all these tailor’s tacks which have to mark both the fabric and the silk charmeuse (from which all of the threads continually slide – I’m going to have to refer to the pattern as I sew, I think), I decide to thread trace most of the seam lines. Although this particular instructor doesn’t’ suggest this, others who teach this French jacket technique do, and it will ensure that I don’t lose my sewing line as the bouclé inevitably frays – which it does. I’m trying to handle it as little as possible to reduce this, but it goes along with this type of fabric.

IMG_1024
Thread tracing & tailor’s tacks on the boucle.


Now it is time to stabilize. Most instructions for this type of jacket suggest using the selvage edges from silk organza. I had some difficulty finding some, and you need a whole lot to be able to cut enough selvage to run around the entire edge of the jacket – including the hem. So, I decide to use soft twill tape – not quite ‘kosher’ it seems, but I think it has a good feel. The stability at the edges shouldn’t be thick or hard, just enough to ensure that the trim has a foundation and the hem stays straight. So I begin.

IMG_1026
Pinning the tape to the centre front edges


I start with the centre front pieces, placing the twill on the jacket side of the seam allowance and pin-basting it in place, ensuring that the snips I make to fit it around the neck don’t go in too far, and that the corners are neatly and securely pinned.

IMG_1030

Then, using tiny stitches with silk thread I sew the seam-line edge of the tape to the fabric. Then I use a herringbone stitch along the inner edge so that the tape will stay flat. I also decide to interface behind where the pocket will be attached. I cut some soft, fusible interfacing (not authentic since most couture garments do not have any ‘fusibles’ in them) to go just beyond where the pocket will be, cut it in two so that the piece on the centre front and the side front go on separately, then fuse it to the pieces. Voila!

I then repeat the process with the back neck line, the hems of all the pieces and the hems of the arm pieces. It takes me quite a while, but when I’m finished, I love the thought that the under-pinnings of the jacket are so well thought out and put together. This is the work that is needed before I can begin putting the body pieces together and quilting that silk lining to the inside of the jacket à la Chanel! Lots of fun ahead!


Resources:

Here is a link to a terrific Craftsy tutorial on making tailor’s tacks (they seem to use my own personal method!): http://www.craftsy.com/blog/2015/01/tailors-tacks-for-pattern-marking/

And another one that also uses the same method!: http://coatsandclarksewingsecrets.com/blogcategory/sewing/tailor-tack-tutorial-by-gertie-2

Posted in Style Influencers

Erté: Style Influence from a Fashion Illustrator

“Not only do I do what I want to do, but I do my work in my own way and never have been influenced by another artist.” ~ Erté

I was on a cruise a few years ago on a small luxury-line ship that showcased some extraordinary artwork. I know, I know: art auctions of schlocky crap are ubiquitous on cruise lines of a certain ilk. This one was different. There were no auctions (with free champagne since champagne flowed freely for everyone all the time), there were no sales people trying sell us pieces in a gallery; rather there were wonderful pieces all around the ship everywhere you looked. It was extraordinary – and they were all for sale.

One day, late in the afternoon, my husband returned to our suite from somewhere (I can’t remember where he had been without me!). He said he had seen the perfect Gloria Glamont piece hanging in one of the staircase landings. So off we went to see it.

The piece was called “Manhattan Mary” and it was a limited edition print of a fashion drawing by Erté. At that point in my life I had no idea who Erté was. All I knew at that moment was that yes, I had to have it. So the research began.

erte as a young man
Erte as a young man.


As soon as we were back happily ensconced in our suite with a glass of something – probably bubbly – we got to work on Mr. Google.

Erté is, in fact, often referred to as one of the single most important fashion influencers of the twentieth century. Born in Russia in 1892 Erté became one of the twentieth-century’s best-known French designers for theatre, ballet, and the rest of us, but for me the style lessons emerge from his illustrations. His name comes from his initials: he was named Romain de Tirtoff. His initials R.T. when said with the French pronunciation become Er-té (Air-tay for those who do not speak French!)

Evidently, at age five he designed his first costume in spite of having a father who had his heart set on a military career for his son. He moved to Paris in 1912 where he began his career as a fashion illustrator. He worked first for designer Paul Poiret then for Harper’s Bazaar. I truly love Erté’s aesthetic as immortalized in his illustrations of others’ designs, but what I really love is his own designs of fashion, theatrical costume and theatre sets which are all heavily influenced by his era – Art Deco.

Well, we purchased the piece. Titled Manhattan Mary I, the piece was a limited edition print signed by the artist himself (Erté died in 1990). My research told me that he had created stage costumes for a Broadway production called Manhattan Mary in the last 1930’s and that this was one of a series he did in the 1970’s based on the earlier work. My piece is numbered 267/300. What I love about my Mary is everything.

my manhattan mary
My “Manhattan Mary”


I love his fashion illustration style. I love Mary’s demeanor. I really love the dress she’s wearing. As I examine more and more of his work (he also designed wall décor, brooches, earrings, did sculpture – all with the same aesthetic) I realize that at some point (after I finish my homage to Coco Chanel project) I will probably embark on a project to create a reproduction of one of his art deco-styled dresses.

I’m so inspired by those who have gone before and left their mark on our culture and style. It would be a shame for people to forget about these inspired creators who may not have fashion houses named after them in the twenty-first century because so much can be gained from studying them. I’m going to go and take a new look at my Mary and see what I can learn about her for my own wardrobe.

Who’s your favourite, lesser-known fashion influencer?