Posted in fabrics, Pattern-drafting, sewing, Style

Love the design, hate the quality: Copying ready-to-wear (Part 2)

I think it’s safe to say that the part I like best about recreating ready-to-wear is the pattern drafting step. When I was in high school, I loved geometry, and what’s more, I was good at it. I also loved analytical trigonometry and got a mark of over 90% in grade twelve. Just as a reminder, trigonometry is “… a branch of mathematics that studies relationships between the sides and angles of triangles…” Flat pattern drafting requires all that on top of the creative aspect. I suppose all those angles and calculations are right up my alley!

In any case, as I move into part 2 of my recreation of a low-quality-but-interesting-design shirt, I am moving from design copying to pattern drafting to fabric cutting and beyond.

When we last talked (okay, I did most of the talking), I had slapped a few grainlines on the pattern pieces, trued up the seams and began to think about the fabric.

The original (cheap) shirt was made from polyester, as is the usual fabrication for Light-in-the-Box online offerings. Although it looks relatively good at the outset, these knit polyester garments quickly develop those little pills that we all hate so much. In truth, taking out that battery-operated lint remover that our son likes to call a “sweater muncher” and applying yourself to the removal of said pills, can be rather meditative. And who doesn’t like the finished product? The problem is that with these cheap fabrics, the pills just keep coming back.

Then add on the problem of breathability, or in the case of the top in question, lack of breathability. What you are left with is an interesting, summer-worthy top that I can’t even consider wearing here in Toronto. It’s been over 27 Celsius (80 for the Fahrenheit people among us) for weeks and is only getting hotter, where it will stay until late September or thereabouts. The goal, then, is to reproduce the design in a better fabric.

Forced into online fabric shopping by the virus-that-shall-not-be-named, earlier in the season, I ordered a length of a linen-blend jersey in a cosmetically-enhancing pale peachy-pink.

I had this project in mind for it, and when it arrived, I was a bit hesitant because of how thin it is compared to its original version, although I realized that if I tweaked the sizing downward, it just might work. This, of course, is my main objection f online fabric shopping. I do it, but I always recognize its limitations. I would always prefer to take a walk downtown to the fabric district than shop online, but I’m happy I have the option of online!

As a result of the fabric’s weight and stretch factor, I decided that it was best to cut it out in a single layer.

I know so many people who sew avoid this like the plague, but it is truly the only way to come close to staying on grain with these kinds of fabrics. And I’m sure we’ve all experienced a cheap T-shirt or two that went all wonky after a wash or two. This is usually because it wasn’t cut on the straight of grain.

After cutting and marking, I had the good sense to stabilize the entire dropped shoulder seam with knit-n-stable tape. I also stabilized the portion of the side seams where the ties would be enclosed.

I whipped on my favourite sewing machine piece – my trusty walking foot – and got started. The original had serge—and-turned hems. I decided to take it up a notch and double turn all the hems. I didn’t go all the way to double-fabric-turned ties, though. In a future project, however, I might go the extra mile.

Well, she’s finished now. It had its first outing yesterday as we wound our way through downtown and the University of Toronto campus on our daily 5-7 km walk.

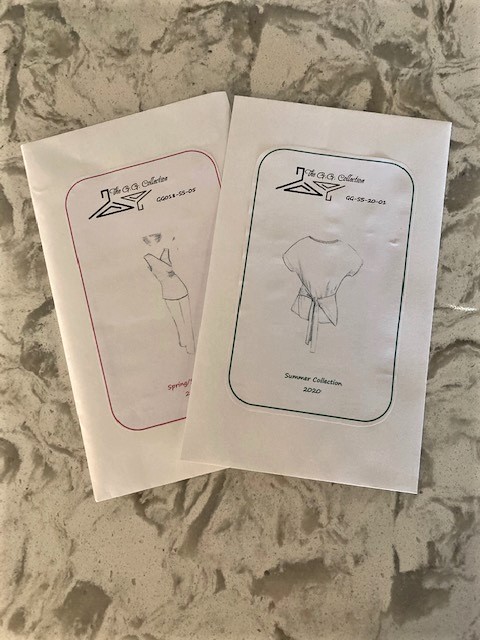
I think it worked out well – at least well enough that I created a final pattern to keep among my collection of GG originals!

This is the second such piece I’ve recreated, and I’ll probably do it again. How about you? Any design copying in your future? Stay safe!

Posted in Pattern-drafting, sewing, Style

Love the design, hate the quality: Copying ready-to-wear (Part 1)

One of the most attractive aspects of making some of my own clothes has always been the opportunity to copy fabulous couture pieces at a fraction of the cost. This was my thought when I embarked on the creation of my first Little French Jacket (LFJ). I loved being able to select some bouclé fabric and silk charmeuse lining, then create a reasonable facsimile of a Chanel-style jacket that cost so much less than an investment in an original.

I loved this process so much that I did it again.

And even Chanel herself was in favour of people copying her pieces.

That being said, there’s another reason for copying ready-to-wear: creating a similar design that I love in a higher-quality fabric. And finding the right technique for creating the pattern is the first challenge. Let me back up for a minute, thought to let you on a dirty little secret.

I actually enjoy browsing on the Light in the Box (LITB) web site and even making a purchase from time to time. Not familiar with LITB? Oh, let me help you with that.

LITB is a Chinese-based web site that sells all manner of objects including thousands upon thousands of pieces of clothing. Think of it as Asian Amazon on steroids with scads of merchandise pieces of often questionable quality. Headquartered in Beijing, it was formed in 2007 and now has web sites in 26 languages and delivers to over 200 countries. So it’s a major player in online retailing.

A screen capture from today on Light in the Box

When we asked our 30-year-old son if he’d ever heard of it (he hadn’t) he spent a bit of (quality?) time on the site after which he said, “I felt as if I’d fallen down a rabbit hole…” That about covers it. If you’re bored and want to lose a bit of time, scroll on over and see how long it takes for you to be swallowed up! Anyway, if you do that, you’ll see why I noticed a few pieces that looked interesting.

Here are a few that I found interesting this year…

Anyway, last year, I actually ordered a piece. Since the site is Chinese, the sizing is a bit different from what I’m familiar with and, in fact, the sizing varies from one piece to another depending on the manufacturer. You really do have to look at the size chart for every piece. But what rarely varies, is the fact that most of the pieces – especially the ones that are so very cheap, which is most of them – are made from polyester. Now, I respect polyester as much as the next person for the characteristics that make it useful – doesn’t wrinkle, endlessly versatile, can have a nice drapey hand, cheap (I did mention cheap, didn’t I?), blah blah blah. And when it’s mixed with other fibres, it can add some value. However, one of the characteristics it decidedly is not is breathable. And this kind of breathability in my wardrobe is essential in summer clothing. So, when I received the top I’d fallen for, I was not at all surprised by its quality. I was surprised that I could have ordered a smaller size. And I especially loved its clever design. So, I decided I’d make a pattern from it and recreate it in a higher-quality fabric.

First up: what technique would I use to copy the pattern?

Last year when I first copied a favourite ready-to-wear piece, the tank top was past its best-by date so I was able to cut it apart and use the fabric as the basis for the pattern.

This time, despite the fabric, I still liked it and wasn’t prepared to cut it apart. Enter the pin approach.

I saw someone do this on a video somewhere along the line but had never tried it. Now was my chance. I took out my old straight-pins that I rarely ever use these days preferring longer pins with ball heads, some banner paper I use for pattern-making and got started.

I laid the top out flat on the paper and began the somewhat laborious task of putting pins in all around the edge of what would constitute the bodice front. These pins went through the edge of the fabric, through the paper, and into the cardboard cutting mat below. You need to have something for the pins to stick into to stay upright. Once I had that piece “pinned”, I took the pins out and was left with the pinholes that formed the basis of the pattern pieces’ edges (without seam allowances of course).

Then it was a matter of connecting the dots and moving on to the next piece.

Fortunately, I selected a design that has only four pattern pieces. This is what I’d recommend you start with if you descried to do this.

Once I had the pattern pieces, I slapped on a grainline and any markings I thought I’d need on them, trued up the seams and was ready to find some fabric. I decided on a linen-blend jersey that I’ll show you in part 2. Stay well!

Posted in Little Black Dress, sewing, Style

Always closet space for a new ‘Little Black Dress’

Anyone who knows me knows that there is nothing I like better than an LBD. Simple and unfussy, the LBD is one of the most versatile pieces of clothing a woman can own. There are so many places to wear one: dinner out, cocktails at a favourite watering hole, under a jacket when giving a lecture, a funeral and just lately it seems it’s acceptable to wear black to a wedding. Well, that’s where I wear them. What’s not to like?

A year or two ago I embarked on my LBD Project which resulted in me testing three different styles – two commercial patterns and one of my own designs. In the end, I made the one I designed myself but along the way, I fitted two others. When I had the opportunity to write a blog post for Fabricville’s blog I thought it would be fun. [For non-Canadian readers: Fabricville is the one ‘big-box’ fabric chain in Canada. The stores are sometimes called Fabricland depending on where you live across the country but their online service is fabricville.com.]

I didn’t realize when they asked me to do it that I’d be getting my fabric choices for free. This has never happened to me before. So, there it is.

To tell you the truth, I might have made different choices for this one, but I had to choose fabrics that were available online from Fabricville.com so I was limited. What I really wanted was a silk dress but they didn’t have much of that on offer.

In the end, I came up with a dress that will probably come in handy although, to tell you the truth, at this  point in 2020, and the way things are going, I don’t see where I’m going to wear it unless there’s an unexpected funeral in my future. Anyway, here’s what I wrote for them…just click on the image…

Posted in sewing

My holy grail of sewing journals: Could this be the one?

A couple of years ago, I wrote about my obsession with finding the perfect sewing journal. You know the kind: a place where you can write about sewing plans, sketch designs, keep fabric swatches, muse about how well (or not so well) a project progressed. And, if you’ve been reading this blog for a while, you know that in my non-sewing/designing life, I’m a writer. In the early part of my career, I was a health and medical writer and then moved onto corporate communication so most of my early magazine articles and books fall into those categories. Lately, however, I’ve been writing women’s fiction but that’s a story for another day. What this means is that journals are very important to me.

I keep a journal for every long-form writing project. In fact, I’ve just bought a new one as I begin a new project. But what does all this have to do with sewing and sewing journals?

Here’s the new one with a sketch from Alfred Sung. It just happens to evoke some of what this book will be all about!

I’m a big fan of Moleskine notebooks – the kind the likes of Ernest Hemingway used to keep notes on new novels but they aren’t really amenable to the kinds of things I need to keep in my sewing notebook. And I’ve tried lots:

Well, after the last time I posted about my search for the holy grail of sewing journals, someone suggested I create one. It’s taken several years, but I’ve finally done it. I’ve created a journal that might be able to take the place of several journals that I use regularly.

I decided that I would make it available for others if they want to try it out. But before you consider trying it (and telling me what you think) here’s me telling you about it…

The coil-bound version is the better of the two in my view but it’s more expensive especially for those of us in Canada since I wasn’t able to have it distributed on Amazon with that binding. It’s only available from Lulu.com. (They do list it in Canadian dollars which is a bit daunting and they do ship to Canada and other countries.) So, I made a less expensive one available with a non-coil binding available on Amazon worldwide. On the upside, it’s cheaper; on the downside, it doesn’t stay open quite as well as the coil-bound one.

Anyway, if anyone out there decides to try it out, I’d eventually like to get your feedback. What other kinds of things would make it perfect for you?