
 The first thing I have to do at this stage in the process of creating my Little French Jacket is review the pattern instructions for finishing the lining by hand and trimming. I know how to do this, but the pattern designer (Claire Schaeffer, Vogue 8804) has her own views that actually differ slightly from my experience.
In the past, I’ve always thought of the trim for the jacket as one of the last things to do – a bit like icing a cake. However, on this occasion, CS wants me to trim the jacket body before I even hand-finish the lining. The problem is that I haven’t got any trim yet! I’ll have to go shopping!
I really consider trim selection to be one of the most creative aspects of making on of these homage jackets. I’m not making a “Chanel Jacket”, rather I’m making one inspired by her designs that have themselves evolved over the years. And the trims that have been used on these jackets have varied wildly!
Here’s what a couple of the spring 2017 jackets looked like:


And the possibilities are endless! Recently, one of my very favourite couture sewing bloggers posted a terrifically informative piece on making Chanel-like trims using a Kumihimo braiding technique. [See “Create Custom Trim for Your French Jacket” on her blog Cloning Couture and I’m certain you’ll be as impressed and inspired as I was!]. This was a complete revelation to me and I immediately went to my Amazon account and put a Kumihimo disc and a book on how to create these braids on my wish list. That done, I realized that this isn’t going to happen for this jacket. I feel a winter project coming on! So, I’m better informed about the possibilities for trimming, but there will be quite a learning curve, and I’d like to finish this jacket sometime in the foreseeable future. So, what to do?
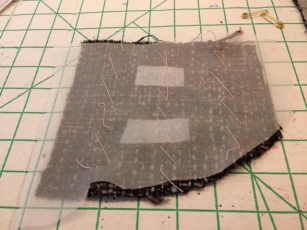
When I bought this fabric, I noticed that it had an interesting selvage in that it was a very nice fringe. So, I was careful to keep the selvages intact when I did my initial cutting.

I highly recommend this! I took a look at my selvages and I find that they will make a very subtle, Chanel-like, perfectly-matched trim for the jacket. So, I run a line of stitching along each of the pieces to prevent any fraying and trim them neatly. Then I press it and brush it with an eyebrow brush. Then it occurs to me that putting the trim on now is not only a new idea, but the only way I can do this. This trim will not sit on top of the edges; rather it will be sandwiched between the fabric and the lining. So, I hand stitch the fringe to the front edges and the neckline, and I’m ensuring that I have enough to trim the pockets and the sleeves when I get to them. It turns out I do, so all is well.

This jacket does not have any trim along the bottom for one very good reason: the lower pockets are close to the edge. It also seems to me that with four pockets that are each trimmed, any more trim would be just too much.
Once I’m finished hand-sewing the trim, I’m ready to pin and hand-finish the lining. I really love this process; it’s so meditative, especially when you have a high table to work on and good lighting. My little Ikea goose-neck table lamp works like a charm.
Before I actually get to the stitches, though, I have to pin very carefully. This is not an easy task since the fringe is on the inside and I have to get very close to the edge, but not so close that it will show. I think basting is the only way to go: the problem is that I don’t want the silk to be marked by the basting stitching which might be there for the few days it will take me to finish this. So, I baste a bit at a time with my Japanese cotton basting thread which marks far less even than the silk thread. I know this because I tried them both first!

I use an invisible ladder stitch with a single strand of silk thread as I’ve been taught and it gives a very nice finish. It’s pretty perfect I think! Now it’s really time to get on with the sleeves, which I have yet to touch. It’s getting there!


 Whenever I see a fantastic jacket of any sort, I always wonder exactly what is underneath that beautifully finished exterior. What does it look like between the lining and the fabric? What precisely is it that keeps those edges straight? How is it that the sleeve cap is so perfect? Oh, I know all about underlining, seam finishing, sleeve setting and all the rest, but putting it all together to achieve a specific finish – well, that’s the thing. And that’s why the stabilizing and other aspects of what goes between what the world will see – the lovely bouclé – and what I will feel – the even lovelier silk charmeuse – is at the heart of my next step.


You must be logged in to post a comment.