The day has finally arrived…I have finished my third Little French Jacket and I am now excited to find places to wear it!

We just returned from a wonderful four-week vacation that saw us taking a ship through the Panama Canal and spending a few weeks tooling along the west coast of South America, spending a week in Peru and just over a week in Chile. That meant that I had to put my couture sewing work on hold for a while, but there are two very good outcomes from this. First, I am very excited to have returned and to see my LFJ with fresh eyes. In addition, I learned all about alpaca wool fabric and sweaters so will share that insight eventually. But now, here’s how I finished that jacket.
When last I posted, I had finished the sleeves along with their trim and hand-finished the silk charmeuse lining. What is left at this stage is the really creative, fun part: making it my own with buttons and pockets.
I ordered a selection of buttons from China (perhaps not the best idea I’ve ever had) but the quality was not exactly as I might have hoped. However, they’ll be great for smaller projects. They were also very late arriving so in my impatience, I headed down to Queen Street West here in Toronto to a favourite spot for button selection (Neveren’s Sewing Supplies) and spent a bit of quality time rummaging through hundreds of styles. I came home with another selection then set about determining the look I was going for.
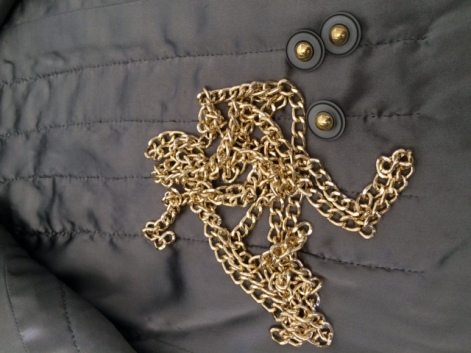
In the end, I decided that the buttons should make a subtle statement reflecting the gold chain that I would be stitching along the hem line in due course.

But first, I have to tell you about the debacle of the buttonholes.
Way back at the beginning of this process I made a decision to go with hand-worked buttonholes, a process that I would have to learn since I’ve never done them before. Well, that didn’t work out so well, so I did some tests of machine buttonholes on the fabric and lining and was satisfied. However, when the time came to actually complete those buttonholes, I realized that I had not taken into consideration the bulk of the seam allowance when I did those samples. It simply was not going to work. I was now in a real pickle. It was too late to do the faux-welts on the interior, the technique that Claire Schaeffer recommends in both this pattern (Vogue 8804)  and in her book, so what to do? I was left only one choice: doing hand-worked buttonholes through both the fabric and lining, an approach that you do, indeed sometimes see in couture garments, but that when done by an amateur can look dreadful. I would have to spend some time learning. So, I made up some samples and start the process. It took me two weeks.
According to the Yorkshire Tailor whose video I shared in an earlier post, you have to do about 30 such buttonholes before you get it right. He has a point. For the first six that I did (using waxed button twist) I made a variety of mistakes. On each occasion I corrected that mistake for the next one until I finally thought I had corrected them all. After about a dozen samples, I decided they were all right so I started with the sleeves. They were okay, but not terrific. The truth is, however, that the thread matches so well that you can hardly see the buttonholes at all anyway. Then it was on to the front.
I took a deep breath and began. The scary part is after the initial preparation of the spot by hand-basting around it to ensure stability while sewing when you have to cut the hole open. At that point there is no going back. It’s not like machine button holes where you cut them after they’re completed. No, these ones have to be cut before you begin since the whole point of them is that the edges are completely covered by the stitches thereby avoiding any of those little strings that can be such a problem in machine buttonholes.
When they were finally completed, I sighed a big sigh of relief and sewed on the buttons. I was not 100% happy with them, but 80% was going to have to do for this first attempt. I’ll do them again on another project and look for perfection. When that was done, it was time to place the four pockets.
Some patterns suggest that you do this before the buttons are in place. I figured that if I did it that way I would run the risk of the pockets looking too crowded with the buttons. This way I could actually see the finished product.

So, I pinned them in place then hand-sewed them to the jacket using double-stranded silk thread for a bit of stability. The final step, of course, is the hem-line chain, a feature of Chanel’s jackets.
Originally inserted as a practical way of weighing down the jacket edges, the chain is now really more of a style statement. However, in the case of this jacket, the extra weight will be welcome. I sew the chain on using short lengths of doubled silk tread with one stitch in each link. These stitches, when done properly, are hidden under the link. I use short lengths in case the chain ever comes loose (which it has done in one of my previous jackets). The short lengths mean that it will only come away for a short distance to be fixed.
The chain is completed, so that can only mean one thing: I finally have a jacket!


This is just beautiful!
LikeLiked by 1 person
Thanks so much. It also feels wonderful to wear! ~GG
LikeLike
Your jacket is very beautiful and well made. I’ve made a few Chanel inspired jacket too and the hardest part are always the buttonholes.
LikeLiked by 1 person
Thank-you! I hope to get much better with those hand-worked buttonholes with more practice! ~GG
LikeLiked by 1 person
This is absolutely gorgeous. Well done!
LikeLiked by 1 person
Thank-you so much! Now to find lots of places to wear it! ~GG
LikeLiked by 1 person
Yes! That’s a new mission – making sure there are fitting occasions at least weekly. And of course, that can just as well be a matter of definition.
LikeLiked by 1 person
So so true… I may even break it out to go to the theatre tomorrow evening!
LikeLike
Now, in my opinion, that’s the perfect occasion!
LikeLiked by 1 person
Gorgeous work G.G.! Looks fabulous on you too. Thanks for sharing your process and insights as well. I will be looking at the Yorkshire Tailor video you suggest, thanks for sharing that link!
I’m deep into working my first couture sheath dress with a Black Watch tartan fabric, and there are so many small details that make up these couture style garments… I see these garments as little bits of architecture, which in turn feeds my imagination and helps give logic to the couture process of construction. I intend to work up to the couture jacket as well, but for now, the dress!
LikeLiked by 1 person
Thank-you for you kind comments. I also have a couture dress on the drawing board. I’m still working at the muslin to get that fit absolutely perfect. I’d love to follow your progress on that dress. I agree with you about these bits of architecture – and isn’t the process so absorbing and satisfying? No fast fashion/sewing for the likes of us! ~GG
LikeLiked by 1 person
I would love to see your dress work!
I will certainly share the results of my dress as well…. I also love the couture process – the more hand work the more pleasure!
LikeLiked by 1 person
Hi Jacqueline…My “Little Black Dress” Project is carrying on in the background! I’m making test garments of several different designs to begin with as I search for the perfect and perfectly fitting LBD. I’ll look forward to sharing this journey here. Best wishes! ~GG
LikeLiked by 1 person