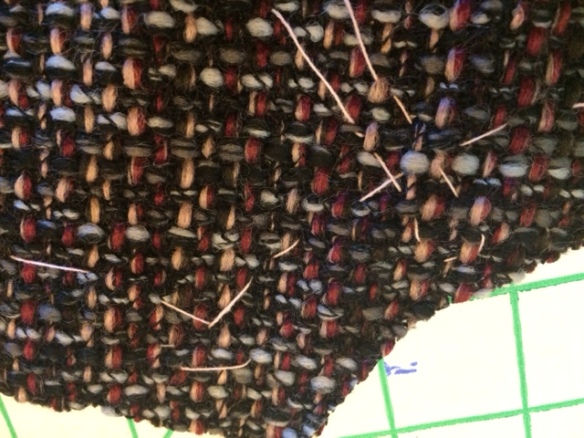
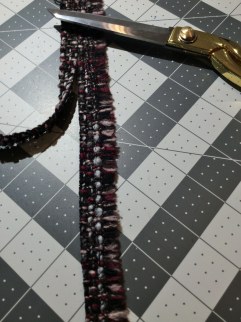
 The more expensive the fabric, I buy, the more trepidation I feel just at that moment when, shears in hand, I hover above the swath of fabric on the table in front of me. I have already prepared the tweed bouclé by steaming it within an inch of its life, and I have carefully laid it out, in a single layer to ensure accuracy. I have carefully measured the grain lines and pinned them precisely where they are supposed to be. But this time around – on this third Little French Jacket – I’m using a slightly different approach to cutting. Rather than simply following a seam allowance, I’m just doing a rough cut. I’ll be marking seam lines and using those for a more accurate fit. And yet, here I sit, shears at the ready, taking a moment to pause and breathe before that first snip. Once that’s underway, I’m committed. Here I go.
This is actually fun, I think as I snip away ensuring a minimum of an inch (which I am eyeballing), all around the perimeter of the muslin pattern that I have already fitted and prepared. Once I have all of the pieces cut out, I am ready to thread trace all of the important markings.

I’m using a product that is new to me. When I viewed Susan Khalje’s couture dress class (I am working on the dress too, but that’s a whole different story!), she introduced me to the concept of Japanese cotton basting thread. She sang its praises so much that I had to have it. I also had to have her large sheets of waxed tracing paper that I used to mark the muslin pieces, so I ordered them all together.
It’s interesting stuff. I have these skeins in four different pastel shades and have selected the pink for my thread tracing. The instructions are to tie a ligature around the skein and cut it in one place. Then I am to take individual threads that will evidently come straight out, not disturbing the remaining thread. And it will be in the perfect length for basting they say. Well, it actually works. So I begin.
First I trace all of the seam lines. At the corner of each intersecting line, I use Clair Schaeffer’s method for taking the corner, knowing that I’ll be able to snip those corner threads to remove them in due course. And I know that I have a precise corner point.

I also use thread markings for the notches, circles, quilting lines on the front (as I mentioned earlier when I examined the pattern, I’ll make up my own mind about where to put the back quilting lines when I get there).
I have cut this out in one layer, but since I made up only a one-sided muslin pattern (that may not have been the best idea I’ve ever had), I do my marking and thread tracing as I go. In other words, I cut out one centre front piece, mark it and then take the muslin pattern piece off and cut out another one and so on. I have been very carefully marking the wrong side of the fabric with a piece of patterned tape held securely with a safety pin. The fabric is essentially the same on both sides, but it would be awful to find I’ve prepared two right front sides rather than a front and a left because I mixed up the right and wrong sides!
 It’s important at this juncture to say that I am also being careful not to cut through any of the selvages. I am preserving them because they are fringed. I don’t know yet how I’ll trim this jacket — that’s a design decision for later. But I do know that I might want this fringe at a later date.
When all that marking is done, I move on to cutting out and marking the lining.
I love silk charmeuse against the body – but I’m not as big a fan of it on the cutting table. Usually, one would cut this in a single layer, but I am finding that using muslin as a pattern rather than any kind of paper pattern makes cutting this out double-layered so much easier. So that’s what I do. Again, I’m rough cutting because I’ll mark the stitching lines to use. I am using white waxed tracing paper and the same method I used with the muslin to mark the wrong side of the charmeuse.
I also need to cut out a piece of interfacing – it’s really underlining in my view, though, regardless of what it’s called on the pattern – for the front of the jacket to support the buttons and buttonholes. In my previous jackets, there was no such layer since they had open fronts.
I test a few fabrics and realize that the only option that will give me the look and feel I want is, indeed, the silk organza – only pure silk will do.
And so, now I’m ready to test stitches, cut out little pieces of iron-on interfacing to place behind the buttonholes, and start sewing. A jacket is on the horizon!


What is it about these jackets that make even the process of constructing them so intriguing? I identified with your trepidation at making that first cut into expensive boucle – I always check and recheck several times before I dare to cut. Whew! But it IS fun, isn’t it?
LikeLiked by 1 person
Oh, it is so fun! I don’t get nearly as much satisfaction out of a 4-hour project as I do from these ones that are a real commitment! And the very notion of cutting into expensive fabric… well, it is such a rush. And don’t we all want to do our best when the stakes are higher! Thanks for weighing in. Nice to know that not all ‘sewists’ out there want cheap and fast! GG
LikeLiked by 1 person